Loading arms work through repeated movement, changing temperatures, and exposure to weather. Over time, seals can harden, bolts can loosen, and metal surfaces can show corrosion or fatigue. These changes may be easy to miss during a quick walk-around. A careful inspection helps teams identify visible problems before they affect safe, reliable operation. It also provides useful information when comparing loading arms from manufacturers in China or elsewhere.
How to inspect loading arms for wear and damage? Begin with the equipment isolated and follow the site’s approved inspection procedure. Check the arm’s structure, welds, flanges, support points, and fasteners for cracks, distortion, rust, or movement. Examine swivel joints and seals for leaks, rough motion, or uneven gaps. Look closely at hoses, couplings, and protective coatings; a fresh stain beneath a connection deserves attention. Small details matter. Record what you find, including the location and condition, and compare it with previous inspection notes. If a defect is unclear, do not guess. Ask a qualified technician to assess it.
A checklist is helpful, but it cannot reveal every internal flaw. That is worth remembering. Inspection frequency should reflect operating conditions, manufacturer guidance, and the equipment’s service history. Clear records make changes easier to spot and support informed maintenance decisions. These practical checks offer a starting point, not a substitute for training, technical documentation, or a formal assessment when damage is suspected.
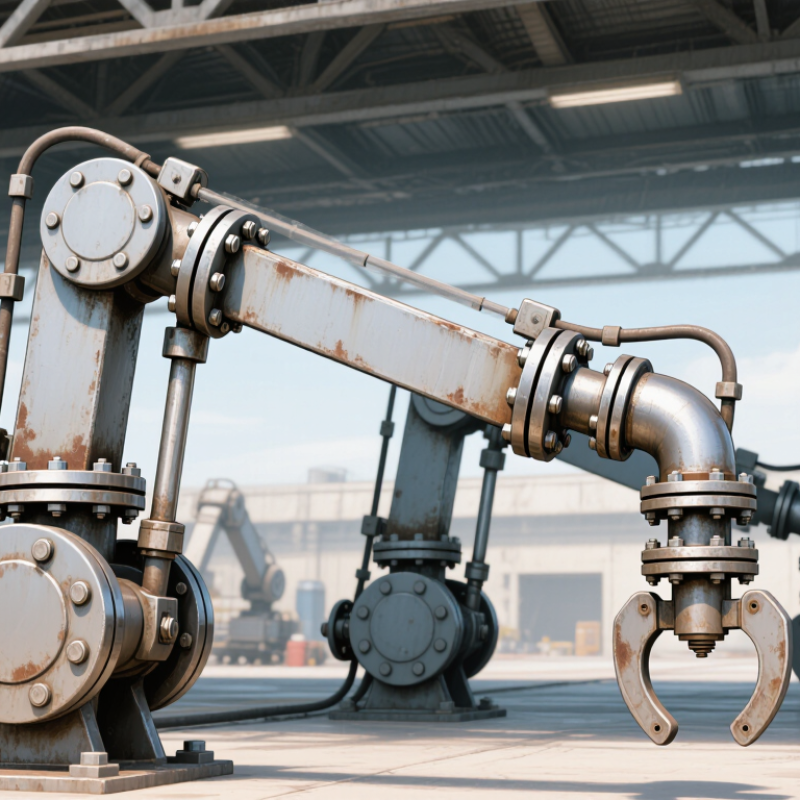
Wear on a loading arm often begins at moving interfaces, not the main steel tube. Inspect swivel joints for rust trails, pitting, loose fasteners, and fresh grease mixed with grit. Check seals for wetness or product staining, and bearings for excess play or rough movement. Small clues matter.
Look at counterbalance springs, cables, hose connections, flanges, weld toes, and support brackets. Cracked paint, distorted metal, or a new scrape can signal repeated contact or misalignment. Move the arm only under approved site procedures, and note unusual resistance or uneven travel. No checklist is perfect. A clean exterior can still conceal seal damage, so visual checks should not replace scheduled examinations by qualified personnel.
The NACE International IMPACT study estimated corrosion costs at about US$2.5 trillion annually, or 3.4% of global GDP. It also reported that improved corrosion management could reduce costs by 15–35%. These figures cover many industries, not loading arms alone, but they show why corrosion deserves attention. Record component condition, photographs, and changes between inspections; a single observation may be ambiguous. Recheck it.
| Component | Common Wear or Damage | Inspection Method | Warning Signs | Recommended Action |
|---|---|---|---|---|
| Swivel joints and swivel seals | Seal wear, corrosion, scoring, looseness, or leakage at rotating joints | Visually inspect the joint and surrounding surfaces; move the arm through its permitted range and check for smooth rotation, abnormal play, or fluid leakage. | Product or hydraulic-fluid seepage, stiff or uneven movement, unusual noise, visible corrosion, or increasing joint play | Remove the arm from service if leakage or unsafe movement is found. Have the joint assessed and seals replaced in accordance with the equipment maintenance instructions. |
| Loading-arm pipes and tubes | External corrosion, dents, abrasion, coating failure, or wall loss | Inspect the full accessible surface, especially low points, supports, splash zones, and areas where pipes contact other structures. Use approved thickness testing where corrosion is suspected. | Deep pitting, visible deformation, wet spots, product staining, or corrosion concentrated around supports | Assess suspected wall loss before continued operation. Repair or replace damaged pressure-containing parts only through an approved procedure. |
| Welds and heat-affected areas | Cracking, corrosion, undercut, or damage near welded attachments | Clean and visually examine welds, including connections at elbows, brackets, and supports. Arrange suitable nondestructive examination if a crack or other relevant indication is suspected. | Linear indications, rust trails from a weld, separation, or a change in arm alignment | Do not grind, weld, or return a suspect pressure boundary to service without an engineering assessment and an approved repair plan. |
| Flanges, gaskets, and bolting | Gasket degradation, loose or corroded bolts, damaged flange faces, or joint leakage | Check for leakage, corrosion, missing fasteners, and signs of joint movement. Verify bolt condition and tightness using the applicable maintenance procedure. | Product staining, persistent seepage, uneven gaps, missing bolts, or visibly distorted parts | Isolate and depressurize the equipment before opening a joint. Replace unsuitable gaskets or fasteners and reassemble using the approved procedure. |
| Counterbalance system, springs, and counterweights | Spring fatigue, damaged connections, loose counterweights, or altered balance | Check visible components, pins, retainers, and attachment points. Move the arm carefully through its operating range and observe whether it remains controlled. | Sudden movement, excessive effort, sagging, uncontrolled drift, or visible cracking or displacement | Stop use if the arm is not properly balanced or controlled. Secure the arm and have the counterbalance system inspected by qualified personnel. |
| Bearings, pins, and pivot points | Wear, corrosion, inadequate lubrication, looseness, or binding | Inspect accessible pivot areas and retainers; check for abnormal movement or resistance during a controlled movement check. | Rattling, squeaking, uneven travel, excessive play, or metal debris near a pivot | Lubricate only as specified. Have worn or damaged bearings, pins, and retainers replaced before they affect safe movement. |
| Hoses and flexible connections, where fitted | Abrasion, cracking, blistering, kinking, corrosion at fittings, or coupling damage | Inspect the hose length and connections without twisting or bending them beyond their permitted limits. Check for leakage and confirm the hose is correctly supported. | Exposed reinforcement, bulges, flattened sections, persistent leakage, or loose fittings | Replace a damaged hose or fitting with a correctly rated component. Do not use temporary patches on a pressure-containing hose. |
| Coupler, end connection, and locking features | Worn sealing surfaces, damaged threads, deformed locking parts, or incomplete engagement | Inspect sealing faces, latches, pins, and coupling components. Confirm correct engagement using the approved connection procedure. | Difficulty connecting, visible damage, a loose connection, or leakage during a controlled leak check | Do not force a damaged or mismatched connection. Isolate the system and replace defective parts before loading or unloading. |
| Support column, base, and foundation connections | Corrosion, loose anchors, cracked grout, deformation, or movement at the base | Inspect the column, base plate, anchor bolts, and surrounding foundation. Compare alignment with established site records where available. | Loose or missing anchors, cracking, settlement, unusual movement, or a change in arm alignment | Restrict operation if support stability is in doubt. Obtain an engineering assessment before tightening, repairing, or modifying structural connections. |
| Hydraulic or pneumatic lines and controls, where fitted | Leaks, chafing, cracked tubing, damaged fittings, or sluggish control response | Inspect lines and fittings while following site isolation requirements. Operate controls only within the approved test procedure. | Fluid or air leakage, damaged lines, inconsistent response, or unexpected arm movement | Isolate the energy source and repair defects before operation. Verify control function after maintenance. |
| Electrical bonding and grounding connections | Loose, corroded, broken, or missing bonding leads and connection points | Visually inspect leads, clamps, and terminals; confirm continuity using the site-approved test method and acceptance criteria. | Broken strands, loose clamps, corrosion, or a failed continuity check | Restore and verify bonding or grounding before transfer operations where required by the site procedure. |
| Emergency release or breakaway device, where fitted | Corrosion, damaged seals, obstructed release mechanism, or incorrect assembly | Check the device identification, condition, mounting, and inspection status against its service instructions. Do not trigger it as a routine test unless the procedure permits. | Visible damage, missing parts, overdue inspection, or evidence of unauthorized adjustment | Keep the device in its required operating condition. Have inspection, testing, or replacement performed by qualified personnel according to the device instructions. |
Inspection note: Inspection frequency, test methods, and acceptance limits depend on the loading-arm design, service conditions, applicable regulations, and site procedures. Follow the equipment manufacturer's instructions and the site's isolation, depressurization, and hazardous-area safety requirements. Do not operate a loading arm with suspected pressure-boundary damage, uncontrolled movement, or a significant leak.
Check support arms, welds, bolts, and areas beneath clamps. Look for bends, cracks, looseness, and corrosion. Small cracks matter.
Rotate it slowly without forcing it. Listen for grinding or sticking, and check for unusual play or uneven resistance. Stop if movement feels wrong.
Look for flattened edges, hardening, cuts, and damp stains around connections. Temperature changes can reduce elasticity, even when a seal looks acceptable.
Check hoses for bulges, exposed reinforcement, abrasion, and sharp bends. Inspect end fittings for movement or rust. A torch helps in dim areas.
Look for wetness, product stains, or residue at seals, joints, drains, and hose connections. Check beneath paint, insulation, and dust for hidden corrosion.
Look for bent pipes, distorted supports, cracked welds, and uneven flange alignment. Compare joint movement with approved tolerances. If none are available, request an engineering assessment.
Record the defect’s location, date, operating conditions, measurements, risk decision, and repair status. Add a photograph with a scale. Records are rarely perfect.
Do not ignore it or tighten a leaking connection blindly. Stop when needed, follow the approved procedure, and request competent engineering review. Small leaks count.
Loading arms are essential for safe and efficient fluid transfer, so regular inspection is necessary to identify problems before they cause leaks or operational failure. How to inspect loading arms for wear and damage? Begin by identifying critical components, including the support structure, swivel joints, seals, hoses, flanges, and counterbalance system. Before inspection, isolate the equipment, relieve pressure, drain residual material when appropriate, and establish safe access and working conditions.
Examine structural parts for cracks, rust, distortion, loose fasteners, and unusual movement. Inspect swivel joints for stiffness, noise, excessive play, or uneven motion, and check seals and hoses for aging, cuts, bulges, abrasion, or leakage. Pay close attention to corrosion, deformation, and damaged connections around high-stress areas. Record each finding with the component location, severity, and inspection date. Minor issues may require cleaning, lubrication, tightening, or seal replacement, while serious corrosion, structural damage, persistent leakage, or excessive joint movement may require professional repair or complete component replacement.

 Liftora Arm